Understanding Party Building
In P5X, the following roles exist and each has a distinct identity. Here, I would like to briefly guide you through examples to see how combinations are formed according to the decision flow.
The roles of P5X are similar to the team composition of the general RPG genre, but each has its own characteristics.
Role Categories
| Icon | Role | Position | Role |
|---|---|---|---|
 | Sweeper | AoE dealer | Attacks multiple enemies with specialized properties. |
 | Assassin | Single-target dealer | Attacks a single enemy with specialized properties. Instead of attacking a single enemy, it deals higher damage. |
 | Strategist | Buffer | Grants a buff that increases the final damage to allies. |
 | Saboteur | Debuffer | Weakens the enemy and grants a debuff that increases the final damage of allies. |
 | Guardian | Tank | Gives a shield to allies or takes damage instead, increasing survivability. |
 | Medic | Healer | Heal allies. |
 | Elucidator | Support | Does not participate directly in battle. Grants helpful buffs to allies or debuffs to enemies. |
Party Build Order
A combination usually consists of one dealer and the rest assisting him as shown below.
If the enemy's attack is too strong, or if the allies must survive a long battle, the tank 'Guardian' or the healer 'Medic' is adopted, but in general, the goal is to inflict as much damage to the enemy as possible within a set time.| Wonder | Buff/Debuff | Buff/Debuff | Main dealer | Support |
|---|---|---|---|---|
 | | | | |
Of course, role boundaries are not as strict as before. Recent units include sub-dealers that also debuff and tanks that also buff, but the core party structure remains the same.
Power creep continues over time, so treat this guide as direction rather than fixed rules and adjust your party to current content.
The practical decision flow is as follows.
- How many enemies are there and what are their weak points?
| Wonder | Buff | Buff/Debuff | Main dealer | Support |
|---|---|---|---|---|
|
Naturally, the larger the number of enemies, the more advantageous the wide-area dealer is, and the smaller the number, the more advantageous the Single-target dealer.
P5X also has a weakness/resistance system. Since the damage is 50% for resistance, 100% for normal, and 120% for weak points, you can only expect damage if you hire a dealer whose main attack is normal or higher.
(Sometimes it shows off strong damage even if these weak attributes are ignored, but let's ignore the exceptions.)
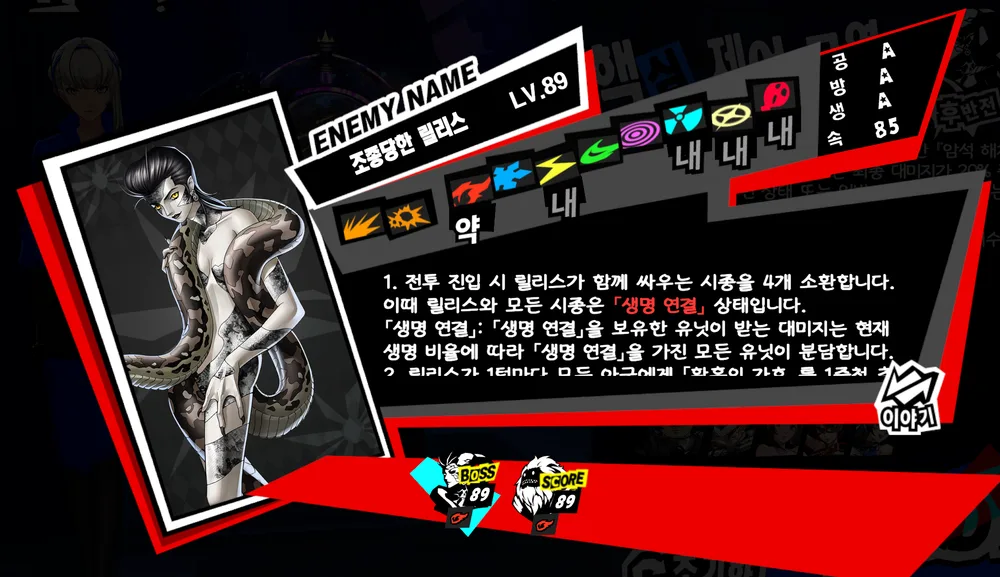
For example, if the boss has a total of 5 enemies weak to the fire attribute, it is recommended to use a AoE dealer with the fire attribute.


The following two representative fire attribute AoE dealers are generally the most recently released dealers.
2. Is there a Buffer/Debuffer pair that matches the dealer?
| Wonder | Buff/Debuff | Buff/Debuff | Main dealer | Support |
|---|---|---|---|---|
| |
Some dealers have clear synergy partners. These pairs complement each other's mechanics and maximize efficiency.
| Combination example | reason |
|---|---|
  | Makoto has a mechanism that makes him stronger when an enemy possesses more than one element. Chizuko grants the enemy more than just an element. |
 | Yaoling has a large damage bonus from skill mastery and burns. Mio strengthens skill master, and if the enemy has burns, the skill effect is strengthened. |
  | Kasumi deals powerful damage through HIGHLIGHT, which can be critical. Ayaka can activate HIGHLIGHT regardless of her ally's cooldown. |
Similar partner relationships exist in other roles as well. Over time, stronger buffers/debuffers may appear and outperform older synergy pairs through raw stats.
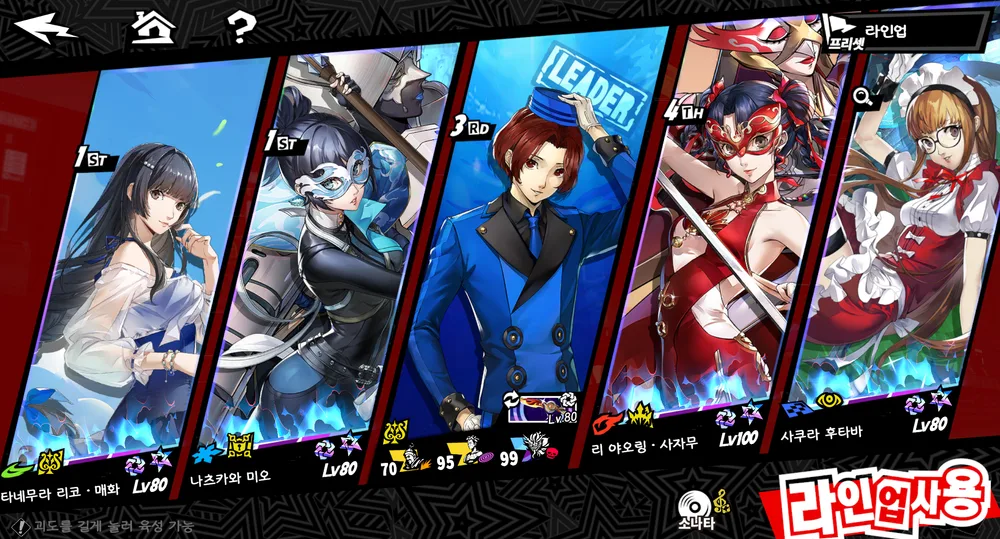
This time, let's adopt Yaoling (Fire)'s synergy partner, 'Mio'.
3. Can enemy defense be pushed as close to 0 as possible?
| Wonder | Buff | Buff/Debuff | Main dealer | Support |
|---|---|---|---|---|
| | | | |
Boss defense heavily reduces ally damage, so bringing enemy defense close to 0 is crucial.
As defense approaches 0, damage rises sharply, and at 0 defense, final damage is typically about 2.6x higher.
Two core factors affect enemy defense: Pierce and Defense Reduction.
If you want a deeper explanation of this mechanic, see the Stats Calculator.
In this example, Mio already applies strong AoE Defense Reduction, but that alone is not enough to bring enemy defense to 0, so consider the following factors.
Example
1) The dealer owns Pierce
2) Debuffer Defense Reduction
- Mio ‘Skill 1’, ‘Skill 3’, ‘Weapon’
3) The Buffer gives Pierce
- Mayumi ‘Skill 3’
4) Main character persona/weapon Defense Reduction
- Wonder weapon ‘Starry Compass’ (22%)
- Persona skill ‘Marakunda’
5) Elucidator (Support) Defense Reduction,Pierce
- Futaba ‘Skill 1’
Defense Reduction - Manaka ‘Skill 3’
Pierce
6) Dealer’s Revelation Card Substats Pierce

In this setup, Futaba and Wonder can add enough defense reduction to bring enemy defense close to 0.
If the combination is not completed here and there is room, move on to the next step.
4. Can the Critical Rate be close to 100%?
| Wonder | Buff | Buff/Debuff | Main dealer | Support |
|---|---|---|---|---|
| | | | |
In general, attack power Buffs and damage bonus Buffs are relatively common, and their effectiveness decreases as they overlap.
Critical Rate is one of the elements that is difficult to obtain unless you spend more than a certain amount of money.
If it exceeds 100%, there is no need to worry, but since it is rare, combinations are usually designed to maximize the Critical Rate.
Sources
1) Elucidator Phantom Thief
2) Wonder’s Persona skill
3) Supporter’s skills
4) Dealer's Revelation Card Option
5) Dealer’s exclusive weapon
Additionally This site also provides a Critical Calculator.
Of course, it is important to strike a balance because the effectiveness increases not only by simply increasing the Critical Rate but also by increasing the Critical DMG(Mult).
Priorities for numbers 3 and 4 may change depending on the situation, and the best thing is to achieve the maximum for both.

If you select Riko, which can increase both Critical Rate and Critical DMG(Mult) at the same time, the combination is now complete.
| Wonder | Buff | Buff/Debuff | Main dealer | Support |
|---|---|---|---|---|
| | | | |
Frequently Asked Questions
Q. Why is there only 1 dealer?
If you replace one slot with another dealer, defense reduction often becomes insufficient or buffs get split, which usually lowers final damage. Of course, it would be a different story if the sub-dealer could fill the empty space left by other positions without taking away a single Buff.
Q. Is Wonder only used as a Buffer/Debuffer?
Yes. Unless a battle has special rules that force Wonder into a dealer role, Wonder is primarily used for buffs and debuffs.
Buff/Debuff is prioritized because scaling one main dealer is usually more efficient than splitting resources into Wonder damage.
Q. I set up a party like this, but it keeps dying.
Try placing a ‘Guardian’ or ‘Medic’ position in your party. If you are not looking for the best score but simply clearing, the correct answer is to place the 'Guardian' and 'Medic' roles.